本文基于Ubuntu22.04.3 LTS,并只介绍Hexo-Butterfly主题部署方法与过程,且本人不懂前端,有些修改方式较为粗暴

0.效果展示

1.live2d_api

项目连接

1.1 PHP

安装php与php-fpm

1
2
sudo apt install php
sudo apt install php-fpm

使用php-vphp-fpm8.1 -v查看是否安装成功

1
2
3
4
5
6
7
8
9
10
root@hcss-ecs-638a:~# php -v
PHP 8.1.2-1ubuntu2.18 (cli) (built: Jun 14 2024 15:52:55) (NTS)
Copyright (c) The PHP Group
Zend Engine v4.1.2, Copyright (c) Zend Technologies
with Zend OPcache v8.1.2-1ubuntu2.18, Copyright (c), by Zend Technologies
root@hcss-ecs-638a:~# php-fpm8.1 -v
PHP 8.1.2-1ubuntu2.18 (fpm-fcgi) (built: Jun 14 2024 15:52:55)
Copyright (c) The PHP Group
Zend Engine v4.1.2, Copyright (c) Zend Technologies
with Zend OPcache v8.1.2-1ubuntu2.18, Copyright (c), by Zend Technologies

安装php扩展

live2d_api仅依赖php-json

1
sudo apt install php-json

配置开机启动

1
2
systemctl enable php8.1-fpm.service
systemctl start php8.1-fpm.service

1.2 Apache

安装

1
sudo apt-get install apache2

配置

安装Apache后,进入Apache的安装文件夹,我这里位于/etc/apache2,文件夹结构如下:

1
2
3
root@hcss-ecs-638a:/etc/apache2# ls
apache2.conf conf-enabled magic mods-enabled sites-available
conf-available envvars mods-available ports.conf sites-enabled

直接修改ports.conf

1
vim ports.conf
1
2
3
4
5
6
7
8
9
10
11
12
13
14
15
16
# If you just change the port or add more ports here, you will likely also
# have to change the VirtualHost statement in
# /etc/apache2/sites-enabled/000-default.conf

Listen 8001 #改为需要的端口号

<IfModule ssl_module>
Listen 443
</IfModule>

<IfModule mod_gnutls.c>
Listen 443
</IfModule>

# vim: syntax=apache ts=4 sw=4 sts=4 sr noet
~

重启服务

1
service apache2 restart

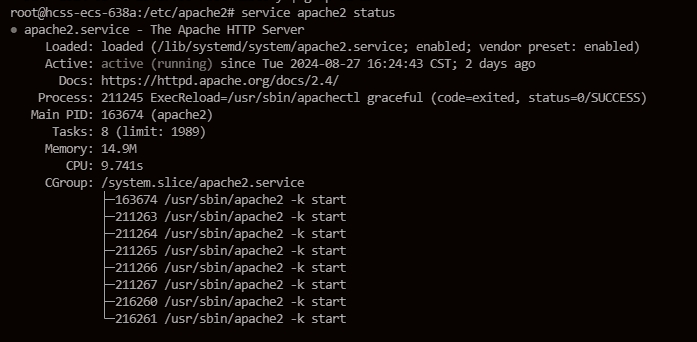
检查是否正常运行

运行正常

部署项目

live2d_api的项目文件夹放到Apache默认页面路径/var/www/html

1
cd /var/www/html

可选择通过git或手动SFTP上传

1
git clone https://github.com/fghrsh/live2d_api.git

完成后文件夹内结构如下

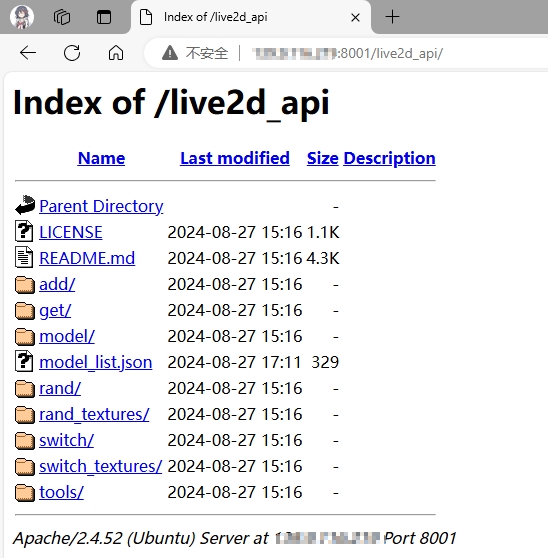
访问http://ip:port/live2d_api查看结果,我前面设置的端口为8001故访问http://ip:8001/live2d_api

访问项目

配置到这里,http://ip:port/live2d_api就已经可以向live2d-widget提供服务
通过修改项目中的model_list.json,并向models文件夹中添加对应文件来实现增加自己的模型

1
2
3
4
5
6
7
8
9
10
11
12
13
14
15
{
"models": [
"myModel/shinobu",
[
"ShizukuTalk/shizuku-48",
"ShizukuTalk/shizuku-pajama"
],
"HyperdimensionNeptunia/nepnep",
],
"messages": [
"咔咔~",
"Shizuku Talk !这里是 Shizuku ~",
"Nep! Nep! 超次元游戏:海王星 系列"
]
}

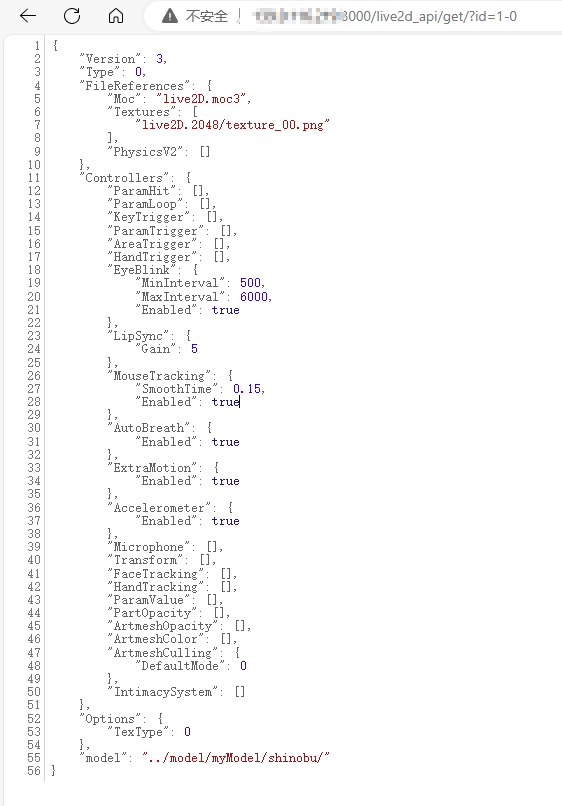
其中models存放模型或模型组的路径,messages存放对应模型的开场白,这里我上传了其他模型shinobu,在models中添加对应路径,对应开场白设置为咔咔~,该模型位于models数组第一个,则对应 id 为1-0,同理ShizukuTalk/shizuku-pajama的id为2-1,则通过访问http://ip:8001/live2d_api/get/?id=1-0即可获取对应json文件,记得将live2d模型的主json文件命名为index.json

1.3 Nginx

通过配置Nginx实现不通过ip+端口号的形式访问api
首先进入nginx的conf.d文件夹,新建一个xx.conf文件,我这里命名为apache.conf

1
2
3
4
5
6
7
8
9
10
11
12
13
14
15
16
17
18
19
server {
listen 443 ssl;
server_name xx.xx.xx.xx; # 你的域名

# 指定SSL证书和私钥的路径
ssl_certificate /etc/nginx/ssl/certificate.crt;
ssl_certificate_key /etc/nginx/ssl/private.key;
add_header 'Access-Control-Allow-Origin' '*';
# SSL设置
ssl_protocols TLSv1.2 TLSv1.3;
ssl_ciphers HIGH:!aNULL:!MD5;
location /{
proxy_pass http://127.0.0.1:8001/;
proxy_set_header Host $host;
proxy_set_header X-Real-IP $remote_addr;
proxy_set_header X-Forwarded-For $proxy_add_x_forwarded_for;
proxy_set_header X-Forwarded-Proto $scheme;
}
}

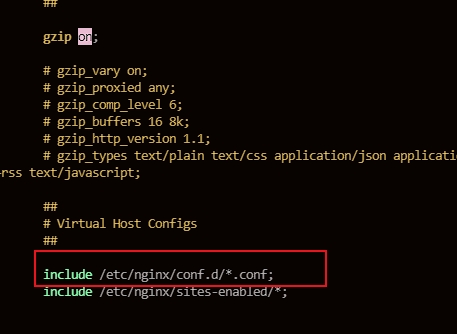
检查nginx/nginx.conf中是否include了自定义的配置文件

之后执行

1
nginx -s reload

重启服务,即可通过域名对api进行https的访问

2.live2d-widget

项目连接

2.1 cdn挂载自己的live2d-widget项目

fork仓库与发布版本

live2d-widgetfork到自己的仓库,权限设置为public

jsdelivr

发布好版本后访问https://fastly.jsdelivr.net/gh/your_name/you_repo@latest/查看挂载到cdn上的项目

2.2 配置api_path

将fork的项目克隆到本地

1
git clone https://github.com/<your_name>/<repo_name>.git

修改autoload.js,将live2d_path改到自己配置好的cdn中
注释掉cdn_path并配置apiPath

1
2
3
4
5
6
// live2d_path 参数建议使用绝对路径
const live2d_path = "https://fastly.jsdelivr.net/gh/your_name/you_repo@latest/";
···
waifuPath: live2d_path + "waifu-tips.json",
apiPath: "https://your_domain/live2d_api/", //自己搭建的api地址
//cdnPath: "https://fastly.jsdelivr.net/gh/fghrsh/live2d_api/",

修改完毕后push到远程仓库并发布新版本即可挂载到cdn

3. 配置到Hexo中

经过如上配置,现在只需将autoload.js配置到Hexo-butterfly主题中即可,编辑/Blog/themes/butterfly/_config.yml

1
2
3
4
5
6
7
8
9
10
11
12
13
14
	···
# Inject
# Insert the code to head (before '</head>' tag) and the bottom (before '</body>' tag)
# 插入代码到头部 </head> 之前 和 底部 </body> 之前
inject:
head:
<script src="https://cdn.jsdelivr.net/npm/axios/dist/axios.min.js"></script>
bottom:
# 插入上面配置好的cdn连接 ↓
<script src="https://fastly.jsdelivr.net/gh/58Q83/[email protected]/autoload.js"></script>
# <script src="https://fastly.jsdelivr.net/gh/stevenjoezhang/live2d-widget@latest/autoload.js"></script>
···
···

hexo clean && hexo g && hexo s即可在本地查看效果

hexo d 部署到远程

4. 结语

由于域名原因,本站live2d功能更换为了OhMyLive2D组件,通过hexo-oh-my-live2d插件应用到hexo博客。XD

本文大量参考

快来给你的Hexo博客招募亿只live2d看板娘吧(๑•̀ㅂ•́)و✧/

相关项目链接:

版权声明

本文引用的项目、以及模型版权均属于原作者,仅供研究学习,不得用于商业用途